I’ve been doing a fair amount of binding lately and thought I’d share a little trick I use to make binding much easier. It’s something I worked out a while ago and makes sure you always have lovely flat binding when you finish off. You can probably tell from the title of this post that the trick is all about where you start the binding!

Just a quick disclaimer, you probably won’t love this trick if you are really committed to joining your binding strips on the diagonal. I join my binding strips end to end using a 1⁄4″ seam and then press the seams open. I’ve never had any problems with that method and some of my quilts are getting on a bit now but if it’s not for you that’s OK. There are plenty of ways to bind and some great tutorials out there too.
So here we go…
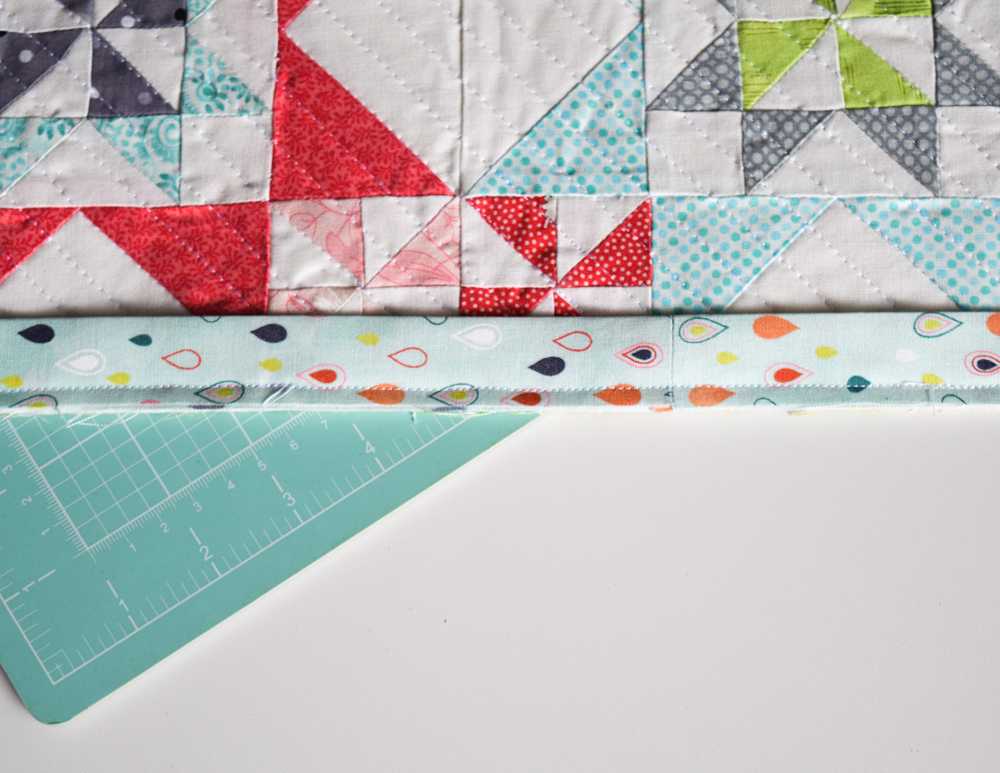
1. Grab you finished quilt and lay in on a cutting board. Find a seam in the quilt that is somewhere in the middle of one side and then line that seam up really well with one of the inch marks on the cutting mat. 
2. Pop your binding on the quilt top. The unfinished edge of the binding strip needs to be aligned with the edge of the quilt. Pin the binding in place exactly 1⁄2″ past the seam line you just lined up on that inch mark. That’s the trick! By taking the time to line up in step 1 and 2 you will have a precise price to cut the binding when you’re finished sewing it on (in line with that seam of the quilt). You’ll have a perfect 1⁄4″ seam and, most importantly, no lumps or bumps in your binding!

If you’re comfortable with binding you can head over to you machine and finish off. If not, the next few steps will show you how to sew your binding on and mitre the corners.
3. Leave at least 8 inches and start sewing the binding down using a 1⁄4″ seam allowance. Stop 1⁄4″ from the first corner and back stitch a little.
4. Take the quilt and binding out of your machine. You don’t need to snip any threads at this point, just manoeuvre it enough to flip the binding strip away from the quilt. It should have a nice 45 degree angle as shown here.
5. Fold the binding back down on top of itself and pin in place. You don’t technically need the pin but I find it keeps the corners nice and neat if I do. Start sewing, again with a 1⁄4 seam allowance, from the top corner of the quilt. Continue sewing around the quilt until you have all four corners done.
6. Stop sewing and back stitch at least 4 inches from the point you started sewing the binding down. You’ll have two tails left loose which you’ll need in step 9.
7. Lay the binding over itself and hold or pin in place. Make sure it’s neatly aligned on both edges.
8. Here’s where lining up the quilt at the start really pays off. Grab a pair of scissors and slip them carefully into the middle of the binding. IMPORTANT: Make sure that you don’t end up with the bottom binding strip in the scissors, you only want to cut the top binding strip. Line the scissors up with the seam you initially lined up on your cutting mat and cut. You’ll be left with an overlap of exactly 1⁄2 and inch.
9. Open up the binding and pin the two ends together and then sew a 1⁄4″ seam allowance to join.
10. Finger press the seams open.
11. Close the binding up again. It will lay nice and flat on the quilt and then sew down the remainder of the binding remembering to back stitch a little at the start and end of the stitching line.

12. Hand or machine sew the back of your binding down and you’re all finished. Perfect flat binding every time and all it takes is making sure you start in the right place.
Happy quilting!

Great tutorial. I join my seams straight too but I’ve been trying a method that joins the final seam on the diagonal and it is VERY fiddly. This way looks much easier! Thanks!
Super interesting. I mostly do my binding the same way except I have never lined it up with a seam. Too bad, my next finish isn’t weeks/months out so I can try it!
Genius!
Great tutorial! When I started quilting I had no idea how to do the binding. I wish I’d had access to this back then.
Thanks so much for this. I always struggled getting the ends of my binding to meet up. Won’t have that problem any more!
Thanks for that Peta! I always thought thought you HAD to join your binding on the diagonal! I’m going to try your way for my next quilt — looks much easier, and less fiddly! I’ll probably feel like a rebel the whole time I’m doing it 😉
Rest binding tutorial! Would be nice if there was pic of finished binding. Does binding seam line up with marked quilt seam?
Great (not “Rest”) binding tutorial!
Hi DebJo, thank you so much! The binding seam will actually end up exactly 1⁄4″ past the seam in the quilt. I’ll see if I can find a picture and add it to the tutorial, thanks for the suggestion 🙂
I just started quilting. Thank you for this binding tip.. It’s going to make my sewing much easier.
Excellent tutorial. I have been stitching binding on the diagonal & have always had a hard time. This is much simpler! Thanks for sharing your method!!
I would love to have a copy of this tutorial for ‘Binding Where do you start’ Thank you Lorraine
i JUST WANT FREE PATTERNS FOR MY USE ONLY. Do you have indian patterns
This is like what I have been doing all the time. I thought I was swimming up river not joining on the diagonal.
When I started quilting recently I had no idea that the binding would be so much harder than making and sewing the blocks was. Thanks for your technique. I will try it next.